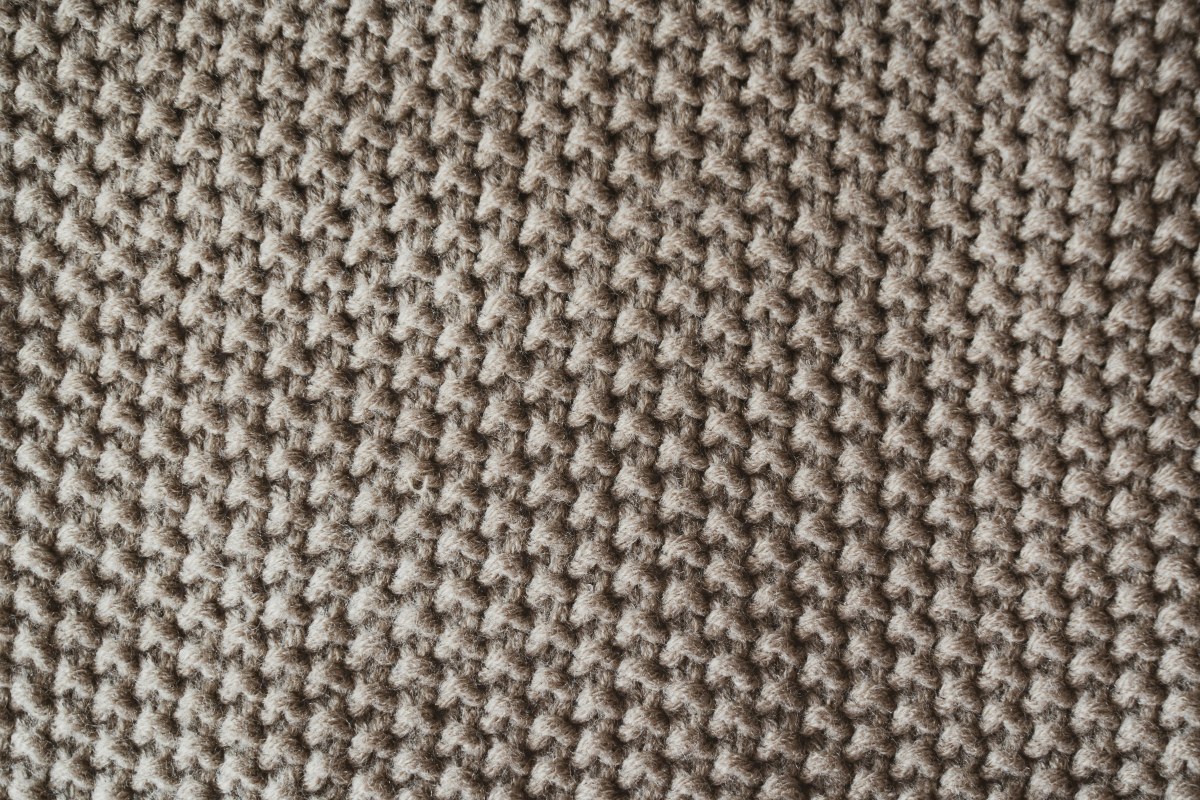
What is seed stitch
Seed stitch (also called moss stitch in American terminology) is a textured pattern created by alternating knit and purl stitches with an offset in each row. The result is a delicate, grainy texture resembling scattered seeds — hence the name "seed stitch".
Seed stitch is popular because it's simple (only two stitches), reversible (looks the same from front and back), and doesn't curl at the edges. It's the perfect pattern for scarves, blankets, and all projects where you need a beautiful reversible appearance without curling.
How to knit seed stitch
Odd number of stitches
Every row: *K1, P1* — repeat to end, last stitch knit.
Because you have an odd number, every row begins with knit and ends with knit. Automatically, a purl stitch will appear above a knit stitch and vice versa — the pattern creates itself.
Even number of stitches
Row 1: *K1, P1* — repeat.
Row 2: *P1, K1* — repeat.
With an even number, you must start the second row with a purl stitch to offset the pattern.
Why seed stitch doesn't curl
In stockinette stitch, there are only knit stitches on one side and only purl stitches on the other — uneven tension causes curling. In seed stitch, knit and purl stitches are evenly distributed on both sides — the tension is balanced and the fabric stays flat.
Seed stitch vs. ribbing
| Property | Seed stitch | Ribbing |
|---|---|---|
| Principle | K/P shift in each row | K/P remain in columns |
| Texture | Grainy, flat | Ribbed, dimensional |
| Stretch | Minimal | Very stretchy widthwise |
| Curling | No | No |
| Uses | Scarves, blankets, borders | Cuffs, borders, cowls |
Projects
Scarf — the most classic seed stitch project. Reversible, doesn't curl, simple to knit. For a scarf, just cast on 30–40 stitches (depending on yarn) and knit to desired length.
Borders and edges — seed stitch is an alternative to ribbing for sweater and blanket borders. It looks more refined and is less stretchy — holds its shape more firmly.
Dishcloths and coasters — practical, quick projects for practice.
Tip
Simple trick for orientation: before each stitch, look at the stitch below it. If you see a "V" (knit stitch), work purl. If you see a bump (purl stitch), work knit. Always work the opposite — and the pattern will form automatically.